Are you new to the whole concept of geofencing and have no idea where to start? Take a deep breath, it’s all good, we’ve got you covered. Here are some tips for geofencing to help you get started with and make the most use of geofencing with the Plot Plugin.
1. Try Geofencing Without Any Coding First
Try receiving geofencing notifications yourself first before implementing the Plot Plugin into your app. All you need to do is create a location based notification in the Plot Dashboard and download our demo app ‘Geofencing by PlotProjects’ for Android or iOS and you are ready to go. For more information about the app read our blog post ‘Experience the Power of Location Based Notifications Yourself’.
2. Size Does Matter
Size your geofences appropriately – you will need to find a balance between relevance and reach. Think about your specific use case and what size geofence you need to make the notification really relevant. Simultaneously, keep in mind how many people such a geofence will get you to communicate your message to. Generally, smaller geofences tend to be more relevant to users and lead to higher click through rates, but there is no universal rule for success.
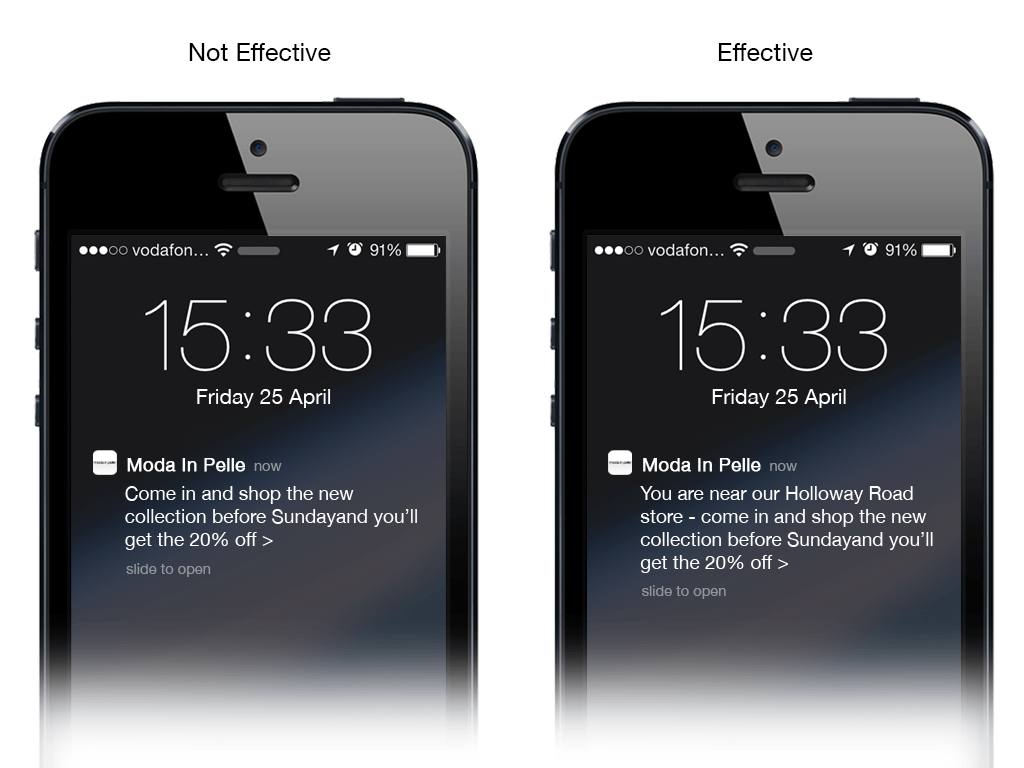
3. Create Clear Messages
Make sure your customers understand that your notifications are location-based – they should know your service is currently near them. Why? Because it will make the notifications more relevant to them and thus dramatically increase the chance of them opening the notifications.
4. Go Easy On Notifications
Notifications are a powerful tool to reach out to your users and engage with them, but it’s a tool that comes with responsibility. Make sure your notifications inspire engagement not irritation. Don’t send too many notifications. People will make a connection between a location and your app and very likely use it next time they are at the same location even without receiving a location based notification.
For more tips to help you create brilliant location based notification, check out the 3 Rookie Mistakes Setting Up Your Location Based Notifications.
5. First Comes the Plot Dashboard Then API
If you are a big company, we understand how terribly you must want to create hundreds of geofences right away. However, in order to thoroughly understand the geofencing process we advise to start-off simple. Firstly, create and manage a small number of geofences, and secondly, do it all in the Plot Dashboard. And only after you got the hang of it and would like to scale, we suggest you use API and integrate it into your management system.
6. No Need To Rush
A basic integration of the Plot Plugin takes about 30 minutes. After this integration you can already start activating your app users with geofencing messages. Take your time to do it right and try to use all the tips we gave you above.
Only when you’ve mastered the basics go on to personalizing your notifications to make them even more relevant to your customers and to further boost the click through rates. And we will make sure to provide you with some more advanced tips very soon to do just that, so stay tuned!
 |
What is geofencing & why I need it in my app?Download the Ultimate Guide to Geofencing for Mobile Marketing to find out more about geofencing and beacons and why to use them in your app. |
