To simplify sending relevant Location Based Notifications in Phonegap, we have made it possible to filter notifications in iOS. Sending personalized and relevant notifications has never been easier. By making notifications relevant you create more engagement than by just sending the same notifications to everyone.
Unfortunately due to the nature of PhoneGap for Android the filter functionality isn’t available using javascript. Instead it is possible to add a filter in Java code, but we won’t go into details on how to do that in this blogpost. All the other functionality will work the same for Android.
Adding the Notifications on the Plot Dashboard
We have recently updated our dashboard to improve its usability. To get started, please ensure that you have an account. If you don’t have one, you can get one for free from here. Using that account, login in to the Plot dashboard.
On the dashboard you can add a new place. A place has a name, a latitude and a longitude. You can find the latitude and the longitude of a location with this tool. Find the location on the map and click on that spot. The latitude and the longitude of that location will be displayed at the bottom. Copy these values into the form and click save.
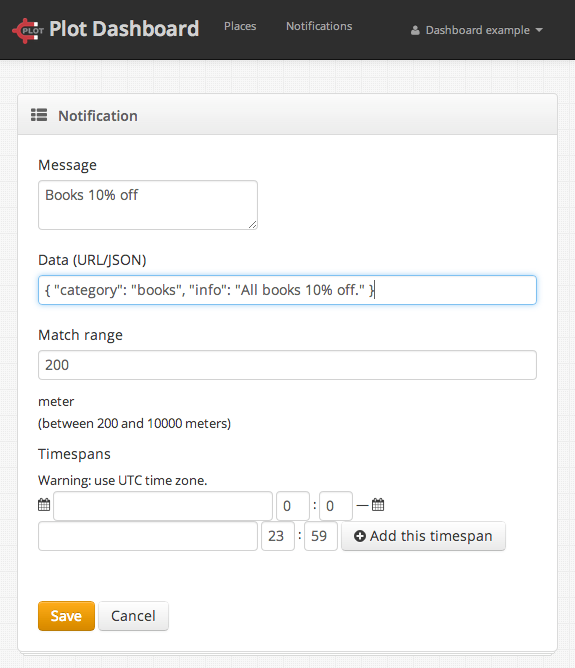
Example on adding a new notification in our dashboard
In this example we format the data field in JSON format. This makes it easier to work with it from code. The payload looks like:
{ "category": "books", "info": "All books 10% off." }
Creating a Filter for iOS
For this demo we create a screen in which the user can make clear what type of offers he wants to see. The user can select from categories using checkboxes.
When the user has made a choice, we store it in localStorage. This ensures the choice is retained between sessions.
When you haven’t added Plot to your project, this is the time do so. The command to install Plot is “phonegap local plugin add https://github.com/Plotprojects/plot-phonegap-plugin”.
It is important to add a filter before Plot is initialized. This is necessary to ensure that the filter is in place when Plot places the device at the position of your notification.
The filter receives a non empty list of notifications that are currently at your location that haven’t been offered to the user yet. The filter function must return the notifications you want to display. You omit the others from the array. When you have enabled the cooldown feature, only the first notification from the list shown so the order is important. You may modify the data and the message field of the notifications to apply last minute changes to it.
In our case we decide which notifications we let through based on the preference of the user. First we retrieve the settings from localStorage. Then we compare the data of the notification to the the user settings.
plot.filterCallback = function(notifications) {
var selectedCategories = app.getSelectedCategories();
  return notifications.filter(function (notification) {
    try {
      var data = JSON.parse(notification.data);
      return selectedCategories.indexOf(data.category) !== -1;
    } catch (e) {
      console.log(e.message);
      return false;
    }
  });
};
These settings are stored in localSettings, which is done using this snippet of code:
…,
getSelectedCategories: function() {
  var settings = localStorage.getItem(settingsKey);
  if (settings) {
    return JSON.parse(settings);
  }
  return [];
},
loadSettings: function() {
  var selectedCategories = app.getSelectedCategories();
  selectedCategories.forEach(function (cat) {
    document.getElementById(cat).checked = true;
  });
}, …
Creating a Notification Handler
When a user opens your notification, you don’t want him to have search your app for the appropriate coupon. Instead you want to display the coupon when the user opens the app. This is done by defining a notification handler. A notification handler also has to be specified before init is called, to ensure that it is in place when a notification is directly received when the app starts.
Note that when the app is in the foreground, no notification will be placed in the notification center, but the notification handler will be called directly.
In this example we display the info field from the notification data on the view.
plot.notificationHandler = function(notification, notificationData) {
  var data = JSON.parse(notificationData);
  document.getElementById("couponinfo").textContent = data.info;
};
Wrap Up
We have shown how to add notifications on our dashboard, how to specify a notification filter and how to specify a notification handler.
The code of the complete example is on Github. The only thing you have to do is to add the Plot plugin to the project and replace the public key with your own key and you can get started.