Please note: Support for Appcelerator has been deprecated
Some time ago we released a module so you can use our plugin for Location Based Notifications in your Appcelerator Titanium app. An important feature that was available to our native users has now been implemented in our Appcelerator module v1.1: custom notification handling.
The default behaviour is to interpret the data field of a notification as a URL and open it when users tap the notification. You might want to do something else in your app. This can now also be done in Appcelerator by writing the notification handling logic in JavaScript.
We will show you how to implement this new feature with an example. This example is compatible with IOS and Android. Suppose you’ve got an app that presents coupons for multiple stores to your users. With the previous version of the Appcelerator module you were limited to displaying the coupon in a browser. Now you can display the coupon information in-app. This example assumes that you already set up the Plot Appcelerator module. If you haven’t done so, read our previous blog post explaining how to set-up the Plot Appcelerator module.
Adding a Notification on the Plot Dashboard
First, login to your account. If you do not already have one, sign up for a free account.
On the dashboard you can add a new place. A place has a name, a latitude and a longitude. Find the location on the map and click on that spot. The latitude and the longitude of that location will be displayed at the bottom. Copy these values into the form on the dashboard and click save.
Once a place has been created, a new notification can be added to that place. A notification consists of a message, a data field, range and timespans that determine when the notification is active. Please note that it can take up to one hour before the phones pick up the new notification.
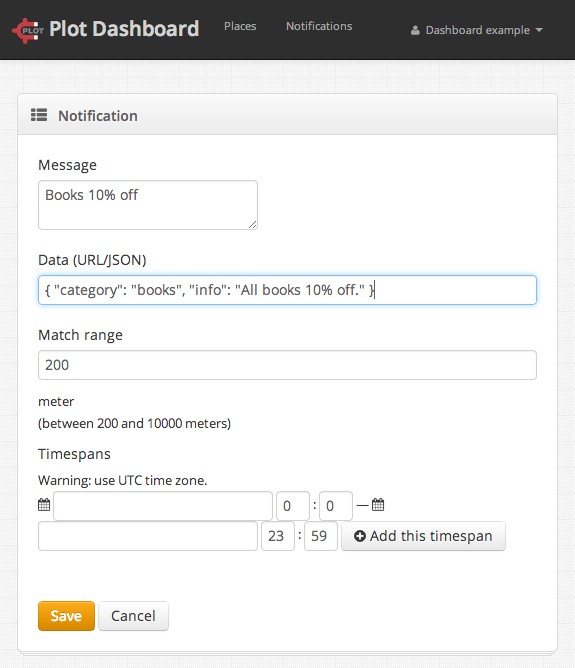
Example a New Notification in Dashboard
{ "category": "books", "info": "All books 10% off." }
Creating a Notification Handler
First install the new Appcelerator Titanium module from the Marketplace.
When a user opens your notification, you don’t want a website to open, but you want to show the appropriate coupon. This is done by defining a notification handler. A notification handler has to be specified before init is called to ensure that it is loaded when a notification is received immediately after the app starts.
Note that when the app is in the foreground on the iOS platform, no notification will be placed in the notification center, but the notification handler will be called directly.
In this example we will display the fields from the notification data on the view. First we create the view:
<Alloy>
	<Window class="container">
		<Label id="title">Plot Example</Label>
		<Label id="coupon">No coupon accepted</Label>
	</Window>
</Alloy>
Then we initialize Plot and get a global reference to Plot in alloy.js:
Alloy.Globals.plot = require('com.plotprojects.ti');
Then in the view we bind the receive notification event to the view. We do this in index.js:
var plot = Alloy.Globals.plot;

// Handle the receiving of an event:
plot.addEventListener("plotNotificationReceived", function(notification) {
   $.coupon.text = notification.message;
});

//Get your public token from http://www.plotprojects.com/getourplugin/
plot.initPlot({	publicToken:'REPLACE_ME' });

$.index.open();
Please keep in mind that when you do not implement a listener yourself, the module will fall back to the default behaviour of opening the URL. Running the code in Android with a debugger attached may cause that the listener isn’t executed.
Wrap Up
We have shown how to add notifications on our dashboard and how to specify a notification handler. The new version of the module is available as a ZIP file on the Appcelerator Marketplace.
The code of the complete example and the source code of the module are available on Github. Remember to replace the public token placeholder with your public token that you can find on the dashboard.