Android 13 has transformed the way push notifications work. Up until Google’s latest update, apps could send notifications to their users without having to ask for permission. But not anymore.
If your app targets Android 13, Google has added the requirement to get explicit permission from the user before sending notifications. Similar to iOS, users are opted out from push notifications by default, meaning apps now need to ask users whether or not they want to allow push notifications.
While this poses a technical challenge, it’s also a big opportunity for you to focus on your push strategy. You need to convince users to allow your notifications. And they’ll notice if you’re sending too many messages or if your notifications are irrelevant to their needs.
Looking for ways to up your push notification game? Read on for our tips to help you maximise your opt-ins when preparing for Android 13 push notifications.

Does Android need permissions for push notifications?
Yes, apps targeting Android 13 will have to ask for permission from users before they can send them push notifications. With its latest update, Android is moving away from its default opt-out push permissions model towards a default opt-in model similar to Apple’s iOS system.
All newly-installed apps will need to request user permission before they can send notifications. While existing apps will get their previous permissions temporarily pre-granted when the user upgrades their device to Android 13 or higher. These apps can continue to send notifications if the user had previously allowed them.
There are some eligibility requirements for permission pre-grant, and some apps that are exempt from the notification permission behaviour change – you can find out more on Developer Android. Or head over to our article about Android 13 changes and upgrade steps for your app.
How do I get notification permissions on Android?
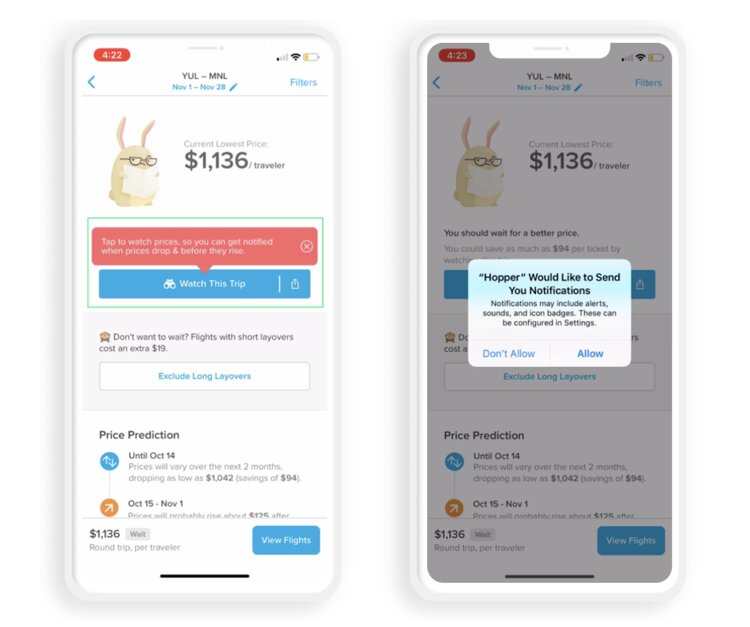
Apps that target API 33 (Android 13) must now request a new runtime permission to send push notifications. This gives users full control over whether or not they want to receive push notifications. Once you ask for permission, they can select ‘Allow’, ‘Don’t Allow’ or they can make no selection and swipe away.
So how do you get users to allow notification permissions? If your app targets Android 13 you have complete control over when the permission dialog is displayed. This means a pre-permission technique can be used to maximise opt ins. You can use this opportunity to explain to users why your app needs this permission and encourage them to allow it.
Use your permission request to demonstrate the value of opting-in for push notifications and explain what the benefits are for the user. After opt-in, you’ll need to continue to engage your users with valuable and relevant push notifications, otherwise you run the risk of them uninstalling your app.
Test your app
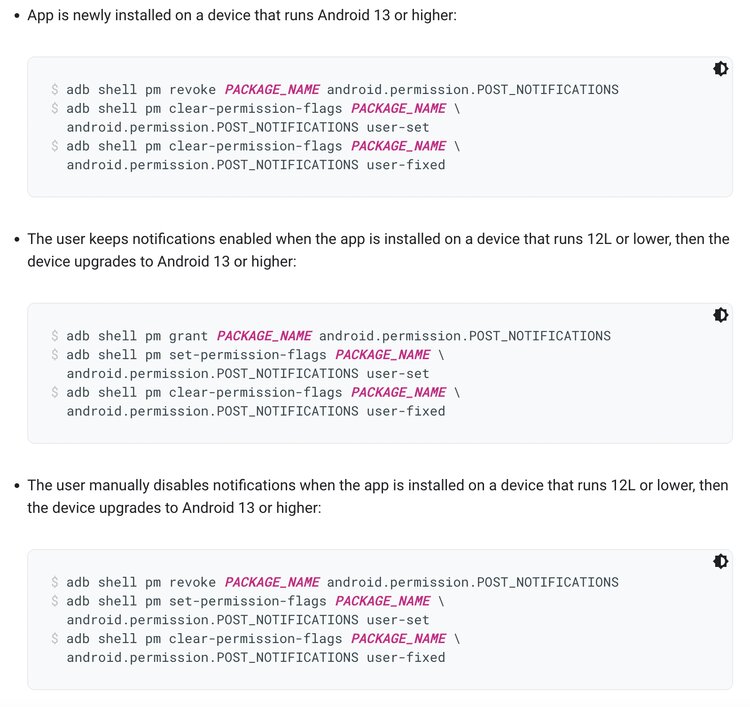
Before your app sends a notification, check whether the user has enabled notifications in your app by calling areNotificationsEnabled(). You can test your app to see how the notifications permission affects it. The following Android Debug Bridge (ADB) commands allow you to simulate the most common sequences of user actions.
Android 13 push notifications – 10 ways to maximise opt-ins
Push notifications can help you boost user experience and engagement by providing valuable, relevant and personalised messaging. But users on Android 13 have to give you permission before you can access their information and send them push notifications.
The good news is it’s pretty straightforward to convince users to opt in. But you only get one chance to ask users to allow your push notifications on Android 13 (unless they uninstall then reinstall your app) so you’ll want to make the most of it.
Here are 10 top tips to help you maximise push notification opt ins for your app.
1. Update your app to Android 13 or higher
If you haven’t already, you might want to target Android 13 as soon as possible to benefit from the additional control and flexibility of this feature.
If you continue to target 12L or lower, you lose some flexibility with requesting the permission in the context of your app’s functionality. Push permission is still requested before sending notifications, however the permission prompt will be automatically triggered by the system at the first app launch, so you won’t have the opportunity to surface the prompt in the context of your app or its value for the user.
You can find out more about this in our blog about Android 13 changes and upgrade steps.
2. Play it cool
Before you jump straight into asking users to grant permissions, why not give them a little time to explore your app and see how good it is? Instead of asking your users to opt straight in (and risk scaring them off) consider playing it cool instead. You can trigger the permissions request from a specific user action such as during a meaningful moment, when they start a high-value action or even on the second or third time they launch your app.
3. Keep it in context
Ensure that people using your app know what your notifications are used for and why they should opt-in. Think carefully about what your app does, what your users want and how they will benefit from opting in for your push notifications. By setting the correct context for your messages and making your intentions clear, you’ll build trust and your chances of getting opt-ins will be much greater.
4. Use permissions wisely
When you get permission to send notifications, remember to use it wisely. If you send too many notifications, or if they’re not useful and relevant, you run the risk of users revoking the permission. Don’t forget, users can see how many notifications your app sends each day, and they’re in full control so it’s important not to overdo it.
5. Demonstrate your app’s value
We’ve said it and we’ll say it again. Convey your app’s value to users and what’s in it for them if they allow push notifications.
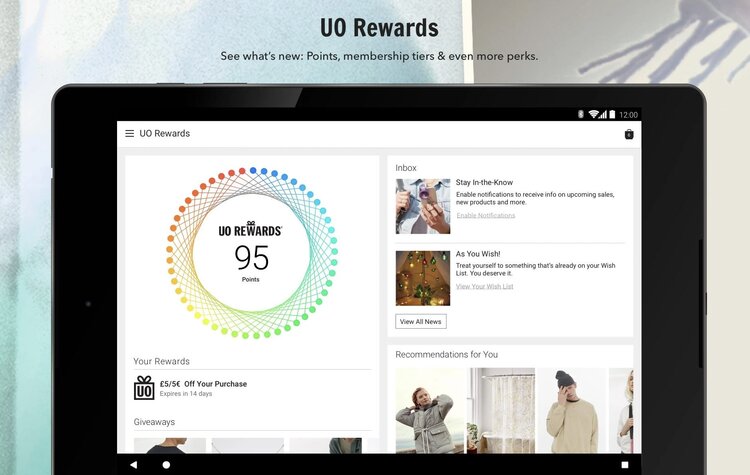
You can do this as early as the app store preview. For example, Urban Outfitters includes the following in its app store description: ‘Stay-In-The-Know. Enable notifications to receive info on upcoming sales, new products and more.”
6. Have an ‘On’ and ‘Off’ button
Make it easier for users to turn your notifications on and off by including the relevant buttons within your app. This way, users can turn notifications off during busy or inconvenient times, then switch them back on when they want to receive them. This is a better scenario for you than them completely deleting your app if they just want a break from notifications.
7. Promote your app
Don’t just rely on your app to get users to opt in. Promote your app in store and point out all the perks that users will receive if they get your app and opt-in for notifications. You can also use customer emails and other channels to market your app, drive app acquisition and entice people to opt-in for notifications.
8. Keep your opted-in users engaged
Once a user has opted in, make sure you keep them happy with relevant and personalised notifications sent at the right time and place. You can do this by sending geofencing notifications based on your users’ current location and behavioural intent.
For instance, if you’re a coffee shop and a customer with your app walks by on their way to work, you can entice them in-store by sending a notification offering 50% off their favorite coffee.
You can find out more about adding geofencing and location-based notifications to your app by contacting the PlotProjects team today.
9. Track opt-in rates & use A/B testing
Track your opt-in rates on Android 13 to keep track of how many users have opted in for notifications. This will give you valuable insights and help you refine your push strategy accordingly to get more opt-ins.
And use A/B testing to try different versions of your push notifications and see which one performs better. Try your notifications out with different text, incentives or images on small groups of randomly selected users before sending the final version to the remainder of your relevant user base.
10. Re-target opted-out users
When a user opts out of push notifications in Android 13, there is no way to send another permission request unless they delete your app then reinstall it. But you still have a few other methods of communication. You’ve got email and in-app messages. Plus you might have their mobile number for SMS marketing.
You can reach out to opted out users and tell them what they’re missing out on by not receiving notifications. You could offer them an incentive such as a special discount, a free upgrade or access to exclusive new features. Make sure you do your research on each channel and find out how to use them effectively.
There’s time to prepare
Still haven’t prepared for Android 13? Don’t panic. There’s still plenty of time to get ready. According to 9to5 Google, Android 12 is running on only 13.3% of all Android devices. It’s likely to take a while for users to adopt Android 13 so there’s plenty of time to prepare your app for the changes.
Need help with Android 13 push notifications?
PlotProjects can help to maximise your app’s value for users who are on-the-go.
With many years of experience and expertise, we can help you engage and delight your app users with amazing location-based notifications and experiences. And with our PlotRewards API you can build local deals and card-linked rewards into your apps and websites within minutes.
To find out more about our geofencing platform and location-based software contact PlotProjects today.